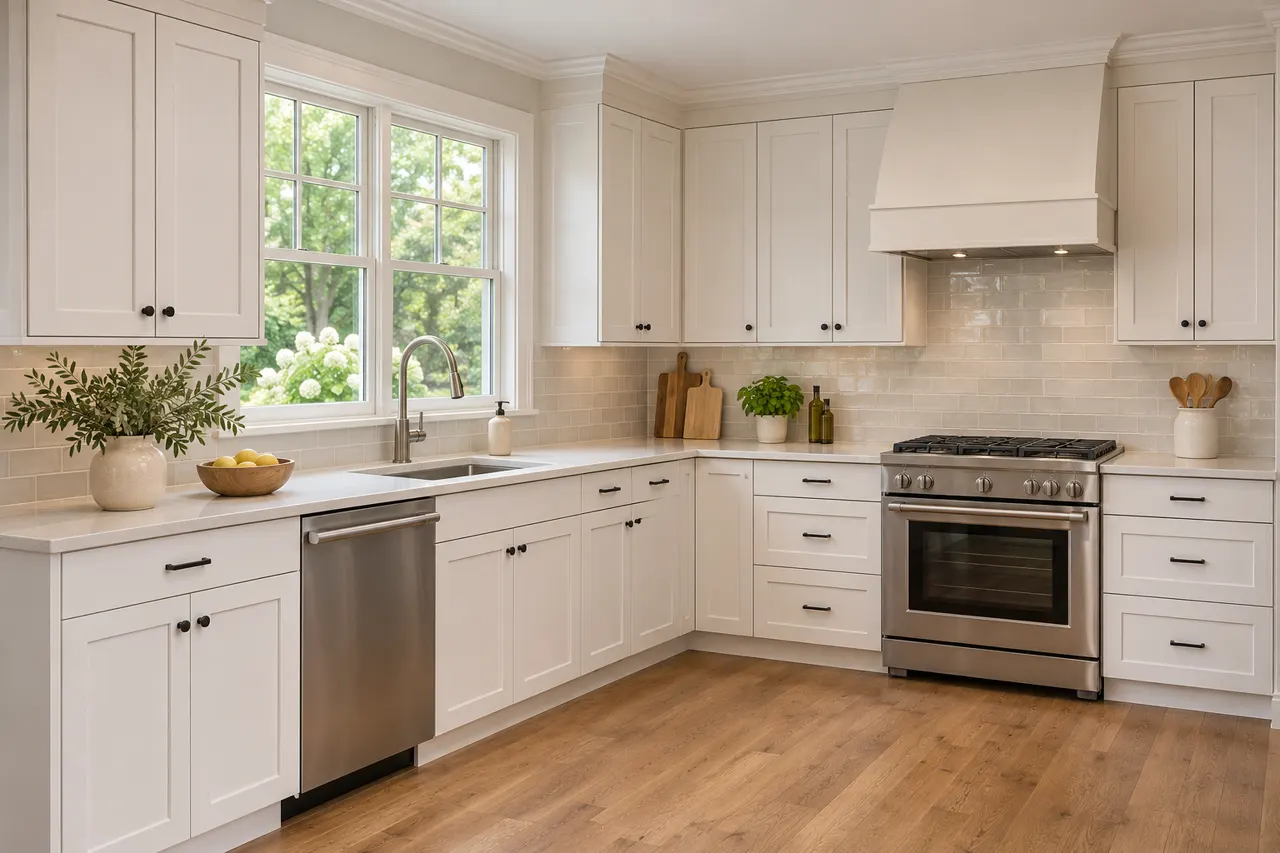
Review the frame proportions on the actual doors
Shaker fronts combine a frame with a recessed panel. The proportions need to be considered on the proposed door and drawer sizes rather than one sample alone.
Place the sample at the cabinet's intended height and beside the retained surfaces. A narrow frame and a broader one can read differently across a whole wall. Record the profile as well as the color; the word Shaker does not identify a particular door product.
- Door sizes: Compare smaller and taller fronts.
- Drawers: Review the proposed front pattern.
- Alignment: Look at adjoining units together.
A frame that looks balanced on a tall door may occupy more of a small drawer front. Compare the complete elevation before choosing the profile. Identify the door profile and the proposed front arrangement in the order.
Coordinate Shaker fronts with the drawer interiors
The visible drawer pattern should follow the storage arrangement underneath. Decide what the drawers hold before repeating their heights across a cabinet run.
Treat a painted finish as a specified product rather than a color name alone. Ask how the proposed front is constructed and what care information accompanies it. Keep the approved sample with the order so the door material, surface and appearance remain linked throughout the comparison.
- Contents: Group the intended drawer items.
- Fronts: Review the visible divisions.
- Interiors: Confirm the proposed drawer products.
A regular front pattern creates order, while different internal needs may call for another division. Review both before choosing symmetry alone. Have the front elevation and drawer specification describe the same arrangement.
Review the corner where framed fronts meet
The front profile and handles need space to operate at a junction. Show the adjoining doors and drawers together.
Handle placement deserves review across the entire kitchen, including drawers and tall cupboards. A position that looks balanced on one front may feel awkward on another. Mark the intended locations before fitting so the approved arrangement can be checked consistently against the drawing.
- Corner: Record the cabinet junction.
- Handles: Review their projection.
- Opening: Check the neighboring door travel.
A tidy closed elevation can conceal an awkward opening sequence. Resolve access alongside the visual alignment. Include the corner arrangement and any required fillers in the cabinet drawing.
Compare the Shaker profile across an island and perimeter
The same profile can serve different front sizes on the island and wall units. Review both areas as one room.
A kitchen island can use the same Shaker profile while differing in color or storage arrangement. Compare it with the perimeter sample and the planned worktop. The order should name the island panels and fronts individually, especially when the visible side faces a living or dining area.
- Island: Show its working and seating elevations.
- Perimeter: Review the adjoining cabinet pattern.
- Palette: Compare the proposed finishes together.
A matching finish connects the two areas, while a separate island finish emphasizes their different roles. The door specification still needs to be clear for each. Identify the profile, finish and visible panels for both cabinet groups.
Decide how the tall fronts should line up
Tall pantry and appliance areas can create a different front pattern from the base cabinets. Review those elevations together.
Use an elevation to compare the frame rhythm across doors and drawers. A single sample cannot explain how several different front sizes will look together. Review the run around appliance openings and corners before accepting a layout that works only as isolated cabinet pictures.
- Tall units: Show their door divisions.
- Neighbors: Compare adjoining wall cabinets.
- Openings: Check the working door arrangement.
Aligning every horizontal line may compete with practical access to the tall unit. Resolve the door function before choosing its final division. Show the tall-door arrangement and adjacent cabinet lines on the elevation.
Consider Shaker fronts beside retained trim
Photograph nearby doors, windows and finishes that will remain. The cabinet profile needs to be considered in that existing setting.
A pull changes both the appearance and handling of a framed door. Test where fingers grip it and how it moves beside an adjacent front or appliance. Include the actual hardware reference and placement in the proposal so the chosen look also has a practical opening arrangement.
- Trim: Show surrounding frames and moldings.
- Floor: Include the retained flooring.
- Light: View the sample in the room.
Matching every profile is one approach, while a simpler cabinet front can create a different relationship. Compare samples beside the actual finishes. Record the selected front profile and the finishing boundaries near retained trim.